Nhờ công nghệ lõi "Agentic AI" (AI tự chủ), Trí tuệ nhân tạo đang tiến…
How to work with Kubernetes Namespaces
In this short article, we will learn about it Kubernetes Namespaces, explains what they are and how to create them on the command line and in the configuration file, with some quick reference command examples using kubectl
What are Kubernetes Namespaces?
Namespaces in Kubernetes allow objects to be grouped. Namespaces can be used for logical grouping, such as to represent multiple environments such as dev, qa, or prod, or to group the objects that make up an application.
Usually, a combination of both examples above is used. For example, if an application is called blog, it can be segmented using the blog-dev, blog-qa, and blog-prod namespaces. Namespaces can be created with the kubectl command line tool or using a YAML configuration file.
The Kubernetes documentation describes the namespaces:
In Kubernetes, namespaces provide a mechanism for isolating groups of resources within a single cluster. The name of the resource needs to be unique within a namespace, but not between namespaces. Namespace-based scoping applies only to named objects (e.g. Deployment, Service, etc.) and not to cluster-wide objects (e.g. StorageClass, Nodes, PersistentVolume, etc.) . If a resource is placed in a namespace, it means it cannot be created without a namespace.
> Reference: Google Kubernetes Engine (GKE) system
Working with Kubernetes Namespace using kubectl
Note that on the command line, if a namespace is not specified for a given kubectl command, objects from the default namespace are displayed.
- View available namespaces.
To view objects in a particular namespace, the name of the namespace must be specified. Creating objects in the default namespace is considered a bad practice because it becomes more difficult to implement NetworkPolicies, use RBAC, and isolate objects.
 Here we have a listed namespace named ingress-nginx.
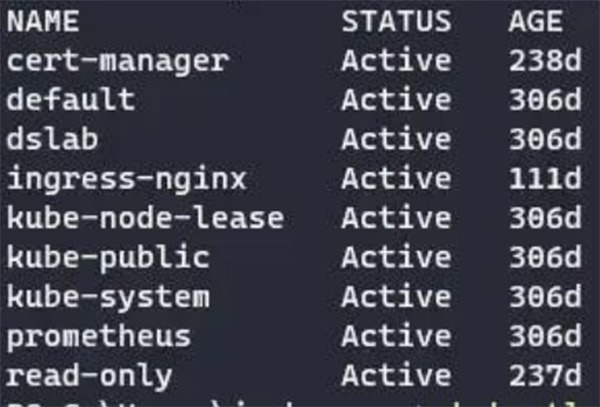 Notice that we also see four Kubernetes namespaces appear:
- default — the default namespace set by the system.
- kube-system — This namespace is assigned to resources created by the Kubernetes system.
- kube-public — this namespace is generated by the system and visible to all users, even unauthenticated users. .
- kube-node-lease — This namespace contains the tenants associated with each node. These leases allow the kubelet to send beats so you can determine node availability.
- Lists the pods contained in a namespace.
To view the pods in the namespace:


- List pods in the default namespace.
To view the pods in the default namespace (without specifying a namespace):

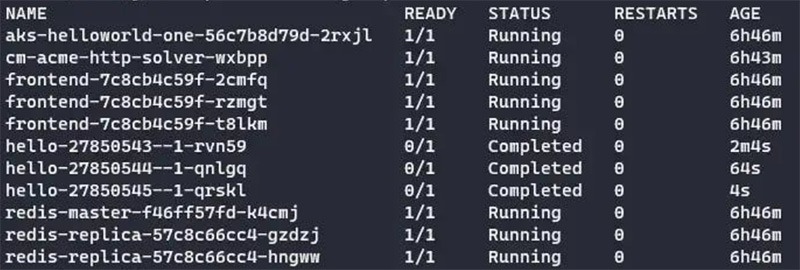
Note that the three pods in the ingress-nginx namespace are not shown here.
- Create a new namespace.
To create a new namespace:

![]() Namespace names can be created with a maximum length of 63 characters using only alphanumeric characters and hyphens. Names cannot begin with a hyphen, and characters can only be lowercase.
Namespace names can be created with a maximum length of 63 characters using only alphanumeric characters and hyphens. Names cannot begin with a hyphen, and characters can only be lowercase.
- Delete a namespace.
And to delete a namespace:

![]()
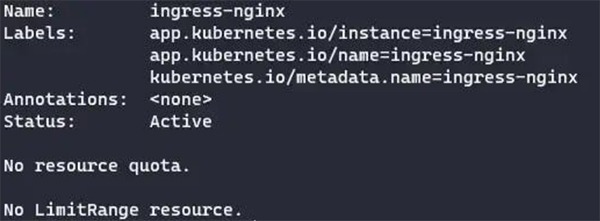
- View detailed information about a namespace.
To view details about a namespace:

- Displays resource usage of pods in a namespace.
To view resource usage (CPU/Memory) of pods in a namespace:


Create a namespace with a YAML configuration file
Create a namespace in the YAML configuration defined as in the example below:


In conclusion
Namespaces are easy to work with with Kubernetes and can be manipulated using the kubectl command line tool or declared in a YAML configuration file. They allow for logical separation and organization of resource groups. Effective use of namespaces can help make cluster management more streamlined.
Also, anything that can be run through kubectl can be run in Spacelift. Spacelift helps you manage complex compliance and compliance challenges using Kubernetes. It brings with it the GitOps flow. So your Kubernetes Deployment is synchronized with your Kubernetes Stack and the pull requests will show you a preview of what they are intended to change. It also has a wide selection of policies, allowing you to automate compliance checks and build complex workflows.
Through this article, we can see that Cloud has been and is an inevitable trend in the technology development and optimization system of enterprises. Gimasys - Google's Premier Partner in Vietnam is a provider and consultant on the structure and design of the optimal Cloud solution for you. For technical support, you can contact Gimasys – Premier Partner of Google in Vietnam at the following information:
- Hotline: 0974 417 099 (HCM) | 0987 682 505 (HN)
- Email: gcp@gimasys.com
Source: Gimasys
Related Posts