Tại Google Cloud, Google cam kết cung cấp cho khách hàng sự lựa chọn hàng…
How to implement API service on Google Compute Engine
In this article, Gimasys will show you how to Deploy API service basic on Google Cloud via Compute Engine. Detail
- Hosting API service running using Docker on Google Cloud server
- Setup domain, SSL for API service
Concepts that need to be understood
API services
API (Application Programming Interface) services are interfaces that provide a program that describes how to interact with the system to access and/or change the data in it.
Compute Engine
Google Compute Engine is an infrastructure service (IaaS - Infrastructure As A Service) of GCP, which allows you to create flexible and cost-effective virtual machines to run websites, applications, etc. for organizations and businesses.
Points to note
- API service is always available on github/gitlab
- You need Full permission on GCP to enable necessary services
- Domain, DNS service (Gimasys uses Cloudflare in this case)
- Basic knowledge of command line is required
Detailed instructions on how to deploy API service on Google Compute Engine
Step 1: Install Git
- Run command
- sudo apt update
- sudo apt install git
- Check if Git has been successfully installed
- git –version
Step 2: Add SSH Key and Clone Project
- Select the folder and start cloning the project from the pre-existing Github/Gitlab
- Assign read/write/execute permission to the directory containing the source code with the command:
- sudo chmod -R 777 .
Step 3: Install Docker Compose
First, we will need to install Docker Compose following these steps:
- Install Docker Compose
- sudo curl -L https://github.com/docker/compose/releases/download/v2.5.0/docker-compose-`uname -s`-`uname -m` -o /usr/local/bin/docker- compose
- Decentralize Docker Compose
- sudo chmod +x /usr/local/bin/docker-compose
- Check Docker Compose permissions
- docker-compose version
Step 4: Build and Run Docker Compose
- Initialization:
- docker-compose up –build
- If there is an error like the code below:
 Please handle by granting read & write permission to user/non-root-process on docker.sock according to the code:
- sudo chmod 666 /var/run/docker.sock
Step 5: Open the application port on VMware
When creating an instance, users should choose one of the two options below to let HTTP/HTTPS traffic from outside the internet be accessible through the firewall:
 Since in step 4, we have selected port 9000 for the application port, now we need to add the following steps to open the application port:
- Open VPC Network and select Firewall
- Select CREATE FIREWALL RULE
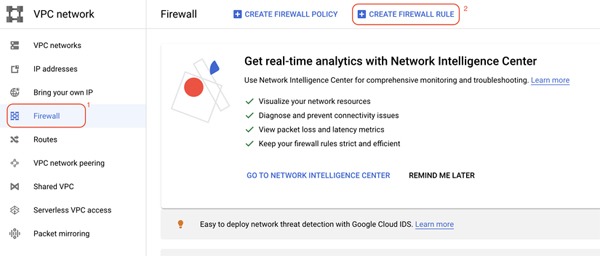
- Enter the rule name field, in the target section click All instances in the network
- Source IPv4 input ranges: 0.0.0.0/0
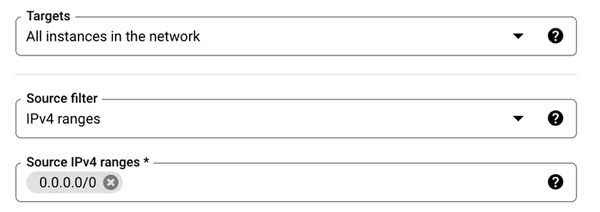
- Select TCP in the Protocols and ports option, then enter the port of the application, here Gimasys enter range 7000-9000
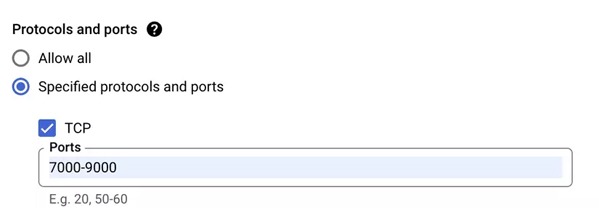
- Click Create
- Go to VMware, open the port corresponding to the External IPs to check

Step 6: Create an instance pool
- First, we need to create instance group Before customizing load balancing for instance. Select Compute Engine > Instance groups > CREATE INSTANCE GROUP:
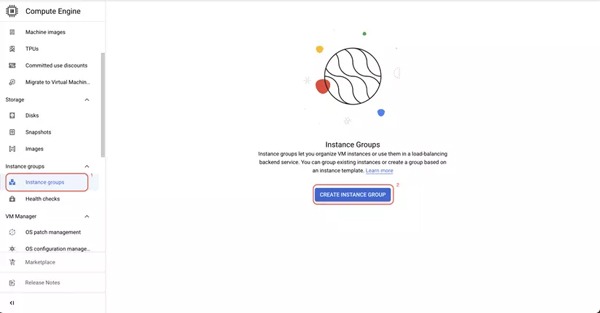
- Fill in the necessary information to install the instance group, in the Port mapping section, we need to enter the correct port on which the application is running:
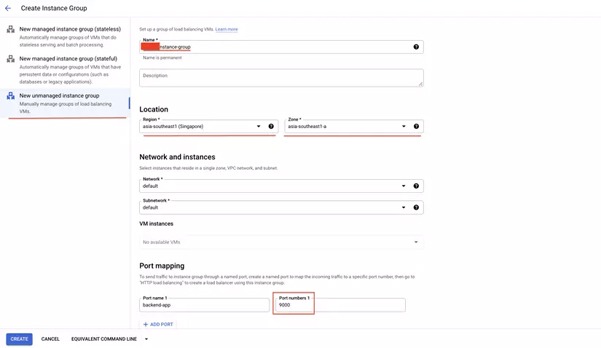
- Click Create
Step 7: Customize Load balancing for vm
- Click Network services > Load balancing
- In the HTTP(S) Load Balancing section, click Start Configuration
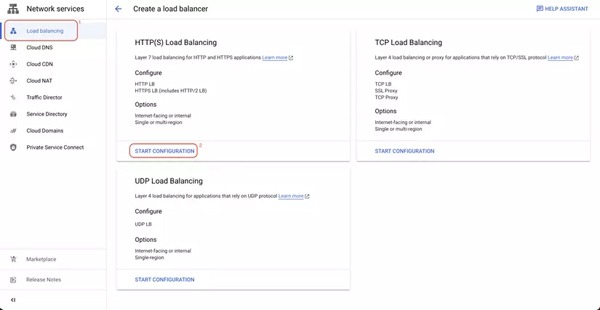
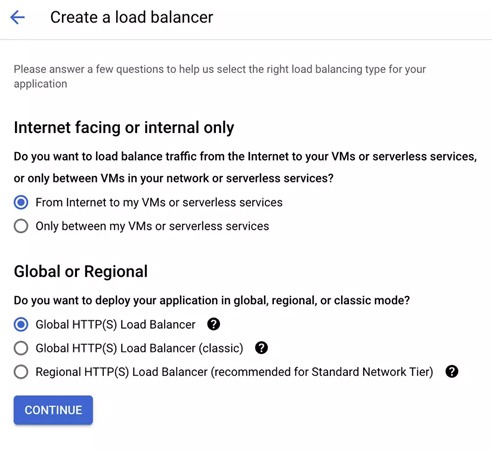
- Select configuration as picture
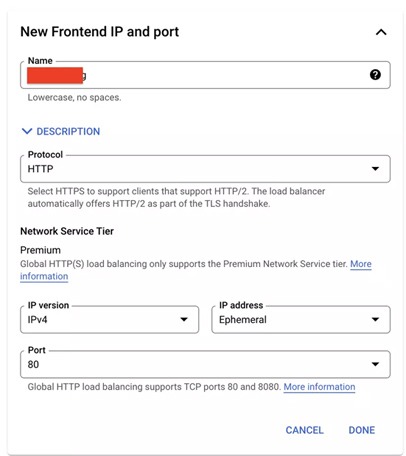
- Enter information for Load balancer config
- Enter information for Backend Configuration
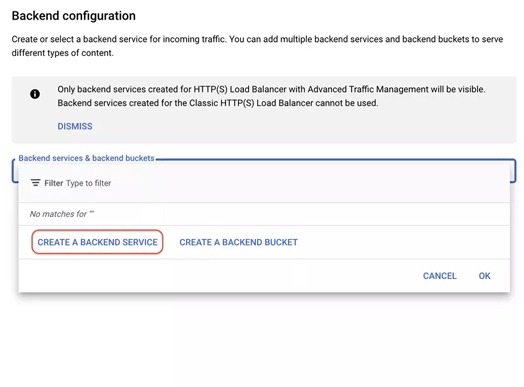
- In the health check menu, select CREATE A HEALTH CHECK, to check if your app is still working:
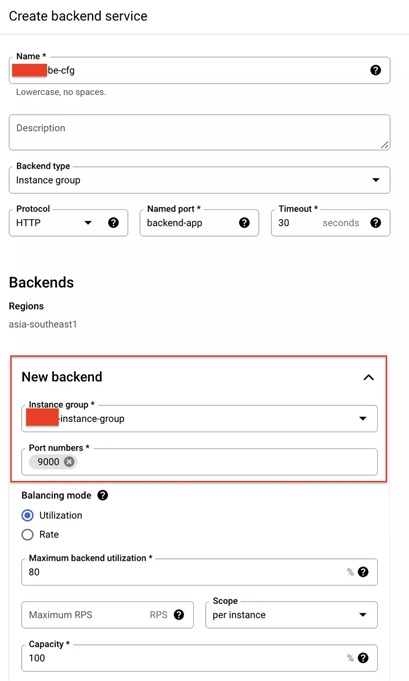
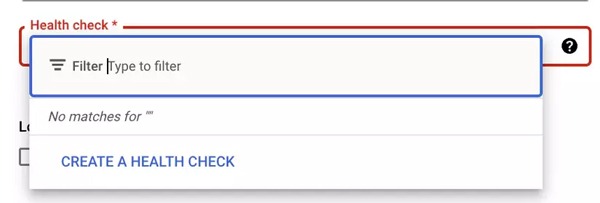
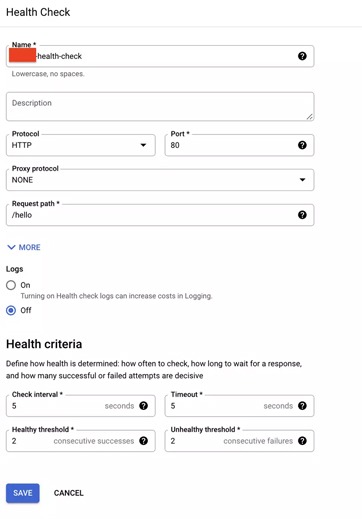
- Fill in the information about the request path, port (note: port is entered according to the running application). The HTTP response code of this path is 200. Click save to save the configuration
- Enter a name for Load balancing Config, click create. When finished, in the load balancing config menu screen, a newly initialized instance will appear.
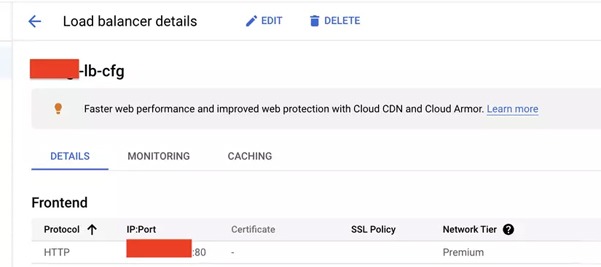
- See IP load balancing in column IP:Port
Step 8: Customize domain and ssl
When you have a domain on Cloudflare and need to assign it to the API service. We need to follow these steps:
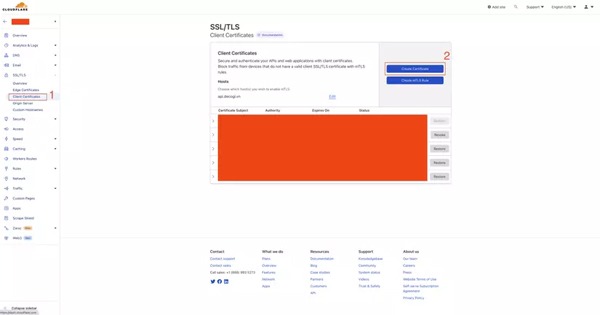
- In the Cloudflare Menu, SSL/TLS tab, click create Client Certificates > Create Certificate
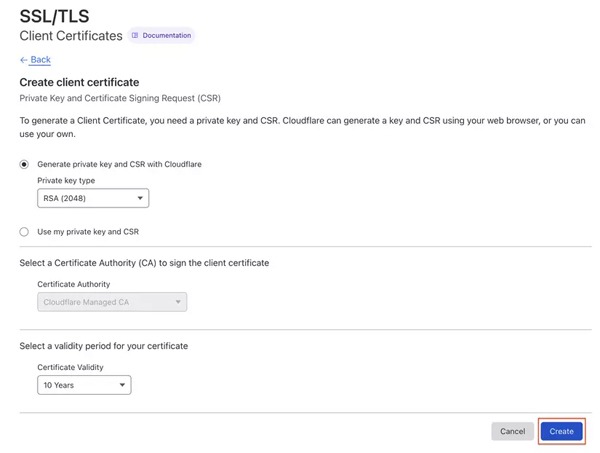
- Click Create
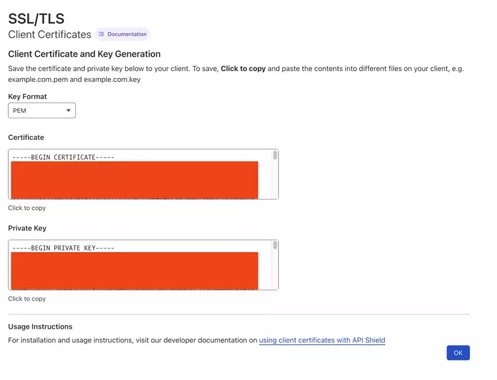
- Save 2 codes Certificate and Private Key
- Open overview tab, click Full for SSL/TLS encryption mode:
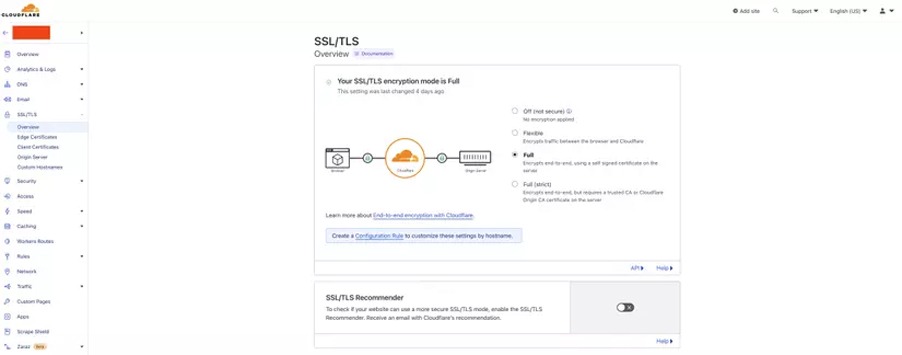
- Return to the load balancing config menu, click edit config, the information will be displayed, click ADD FRONTEND IP AND PORT to add customizations for the https protocol:
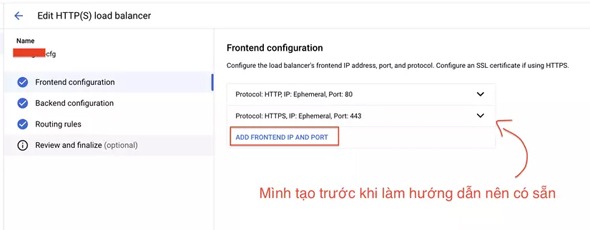
- In the Certificate field, select CREATE A NEW CERTIFICATE, enter the Certificate and Private Key information according to what was generated from Cloudflare
- Click Create
- Click Done > Update to complete customization
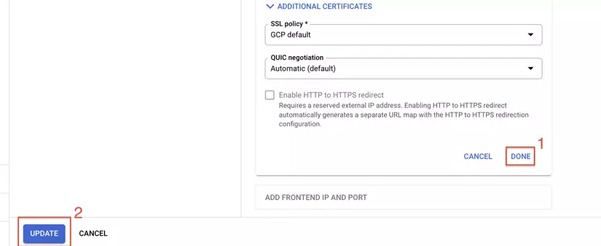
- Go to the details of the load balancing config, get the IP address of the HTTPS protocol just created, note that only copy the IP

- Back to Cloudflare, in the DNS/records menu, click Add record and add the following steps:
- Type: A
- Name: @, www or your subdomain. If your domain is 123.com, you can create a subdomain like abc.123.com
- Click Save
In conclusion
In this article, Gimasys has shared with you how to Deploying basic Api service on GCP through Google Compute Engine. We can double check by accessing domain/sub domain from browser
Gimasys - Google's Premier Partner in Vietnam is a provider and consultant on the structure and design of the optimal Cloud solution for you. For technical support, you can contact Gimasys – Premier Partner of Google in Vietnam at the following information:
- Hotline: 0974 417 099 (HCM) | 0987 682 505 (HN)
- Email: gcp@gimasys.com
Source: Gimasys


