Nhờ công nghệ lõi "Agentic AI" (AI tự chủ), Trí tuệ nhân tạo đang tiến…
Instructions on how to use the Gmail send timer feature
If you are a person who often has to use email for work, there must have been many times when you feel inconvenient when you cannot schedule Gmail to send. Before that, there are some temporary solutions to this problem, which is to install third-party Chrome extensions like Boomerang. However, the usage is a bit complicated and can affect the security of your account when you have to allow 3rd party utilities to access your data. Now, on the occasion of its 15th anniversary, Gmail has finally added a smart timer scheduling feature without you having to install any other add-ons.
1/ How to use the Gmail send timer feature
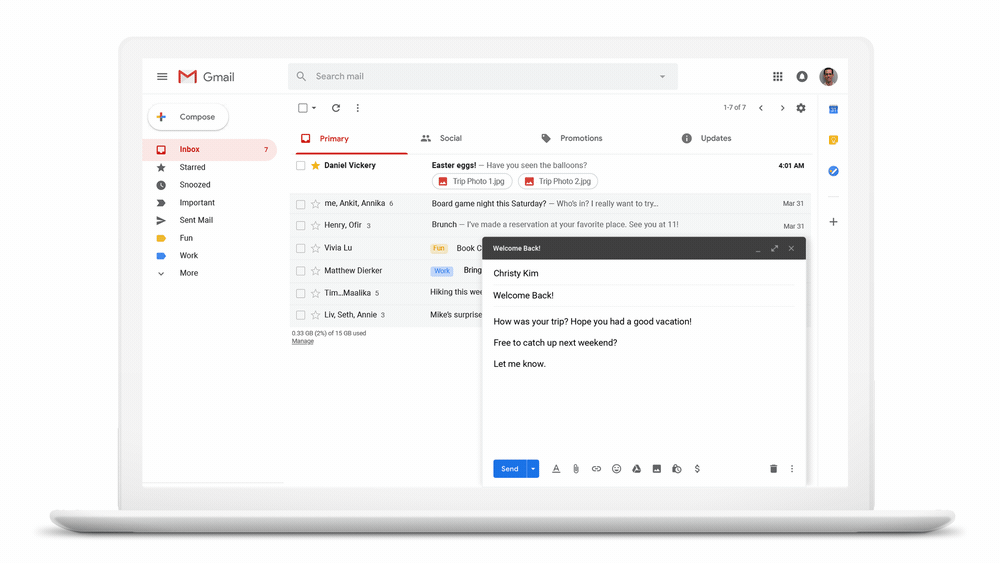
- Go to your personal Gmail account and select Compose (sign icon "+” in the menu on the left to compose a message.
- Prepare the content and enter the recipient's email address (You can only schedule Gmail after you have entered the address in the "Big” – To whom).
- Next to the “Send“, you will see a drop-down arrow. Please click on this arrow and select “Schedule send“.
After selecting Schedule Send, you can schedule Gmail to send quickly by choosing the time periods that the system suggests available. If none of the options are suitable, you can completely set up your own timeline.
Choose from a range of suggested time periods:
- Tomorrow morning: Month/day, 8:00AM (sent tomorrow morning, at 8:00am)
- Tomorrow afternoon: Month/day, 1:00pm (sent tomorrow afternoon, at 1pm)
- Tomorrow night: Month/day, 8:00pm (sent tomorrow night, at 8pm)
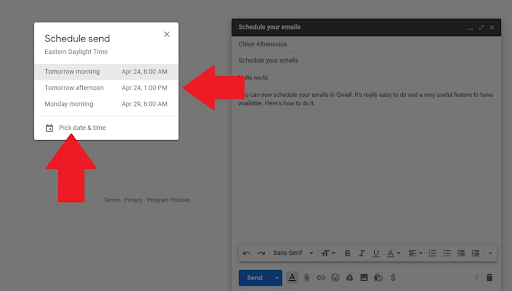
These options all clearly display the exact date and month so you can better visualize how long the email was sent.
Set your own email delivery time:
- Option "Pick date & time“
- In the calendar that appears, select the time period you want. You should choose this way if you want to send it in the next 2, 3 days or even a few weeks.
- Choose "Schedule send” to confirm the sending schedule.
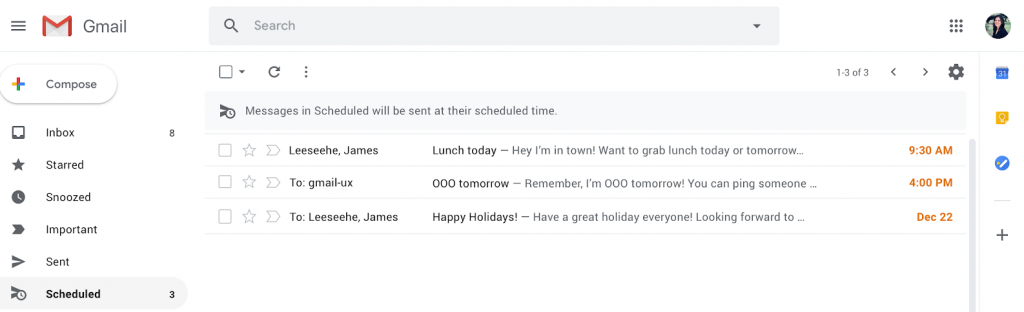
2/ Manage emails that are scheduled to be sent
Review emails that have been timed to send:
- Once you've scheduled your messages, a folder will be created and appear in Gmail. You can go to the menu on the left, select the item "Scheduled” to see emails waiting to be sent.
Cancel the Gmail send timer setting that I created:
In any event that you want to cancel this booking, you can do it in two ways:
- Way 1: Just like the Undo Send feature, after you click the “Schedule send” (Sending Timer), immediately the system will appear a confirmation message whether you really want to do this or not. Please click "Undo" and the email you just composed will go back to ""Draft” – Draft letter.
- Way 2: If you have timed multiple emails and you only want to cancel certain messages, go to Scheduled and directly select the email to cancel the sending timer. Then click on “Cancel send” and the email will go back to draft status
3/ Why do you need the Gmail send timer feature?
- You want to schedule bulk emails to be sent at a time you specify. This is very useful if your work often requires sending notifications, greetings, reminding customers to renew services, etc.
- Your coworkers, clients, or partners work and live in different time zones (and of course, you want to be polite and don't want your emails to arrive in the middle of the night).
With this feature of G Suite (Workspace Google), you will be more proactive in your work, control the working time that suits both you and your partners and customers. In addition, this send timer feature will also make collaboration in an international environment much more convenient.
Gimasys
Related Posts